QUICK START

Convert Your First File in Minutes

Upload your data, choose an output format, and download the result. No complicated setup required.

What you'll need

A geospatial file to convert. For this example, we'll use a Shapefile and convert it to GeoPackage.

Shapefile note: Shapefiles contain multiple companion files (.shp, .shx, .dbf, and optional .prj). The simplest way to upload them to GeoJibe is to zip those files together into a single ZIP archive (such as neighborhoods.zip) and upload the ZIP.
Step 01

1. Add your file

Open GeoJibe and choose Upload.

Add your Shapefile (neighborhoods.zip) and let GeoJibe inspect the data. GeoJibe automatically analyzes the dataset and displays the format, file size, and layer details.
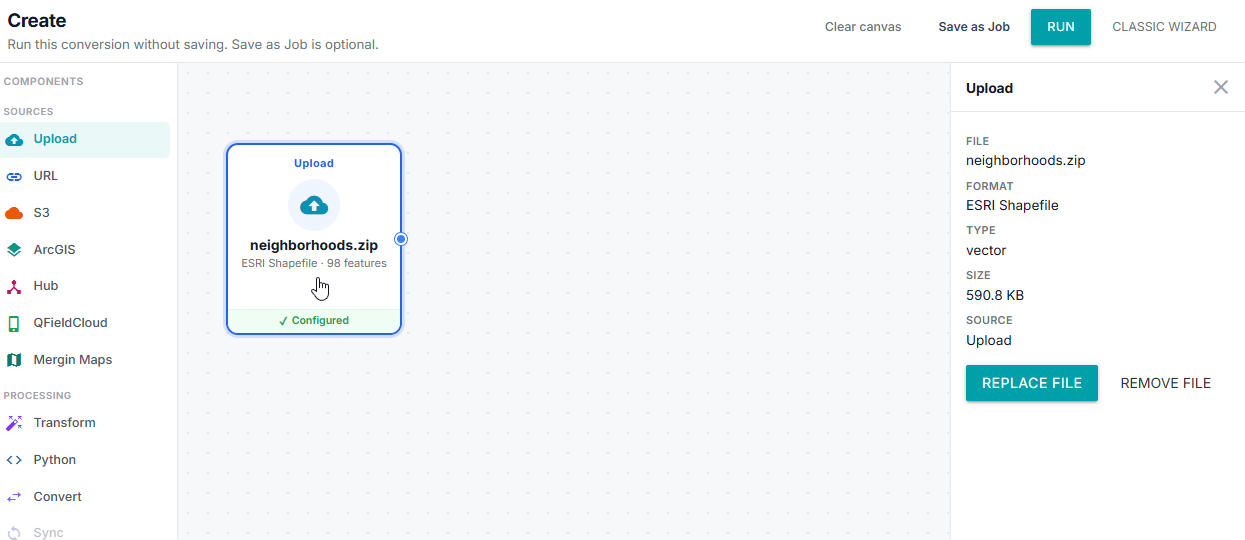
GeoJibe Canvas showing Upload component configured with neighborhoods.zip
Step 02

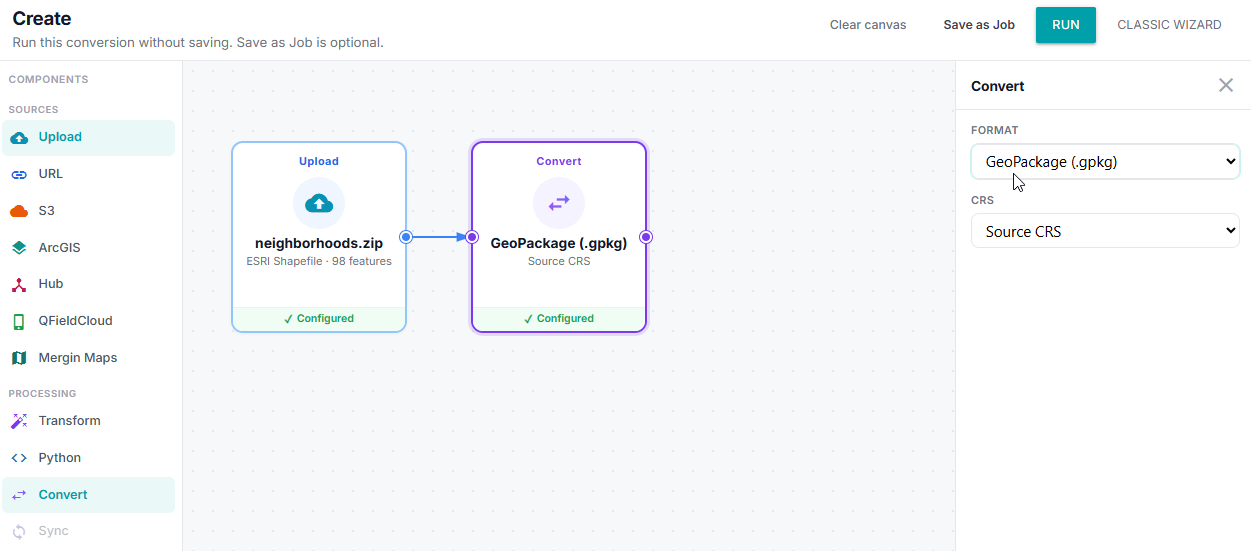
2. Choose the output format

Add Convert to the workflow and choose GeoPackage as the output format.

We'll keep the coordinate system the same for this example.

GeoJibe Convert inspector with GeoPackage selected
Step 03

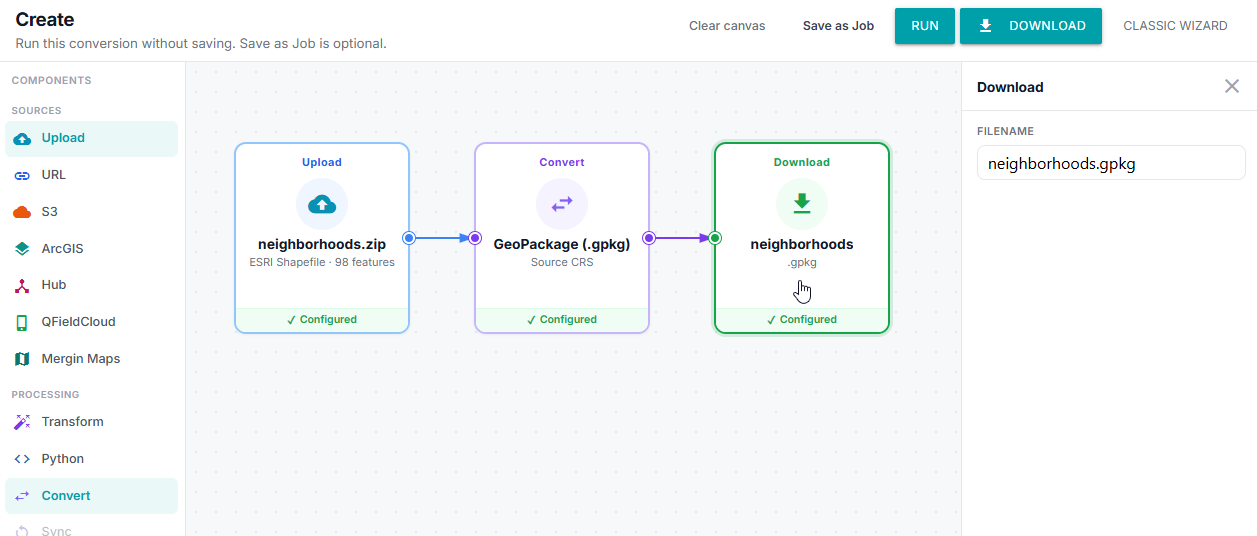
3. Choose Download

Add Download as the Destination.

Your workflow is ready to run.

Completed GeoJibe Canvas containing Upload to Convert to Download
Step 04

4. Run it

Click Run.

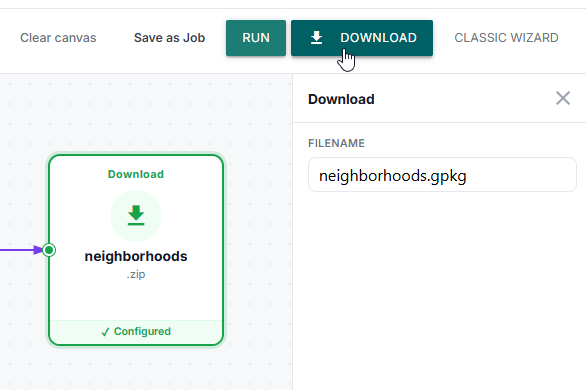
GeoJibe converts the data and prepares the GeoPackage for download.

Conversion complete neighborhoods.gpkg • 3.2 MB
GeoJibe completed run state showing Download button ready

We can stop here — but let's make it interesting.

You've already converted a Shapefile to GeoPackage and downloaded the result. Now let's use the same Canvas to build a more useful workflow.

Step 05

5. Use a new Source

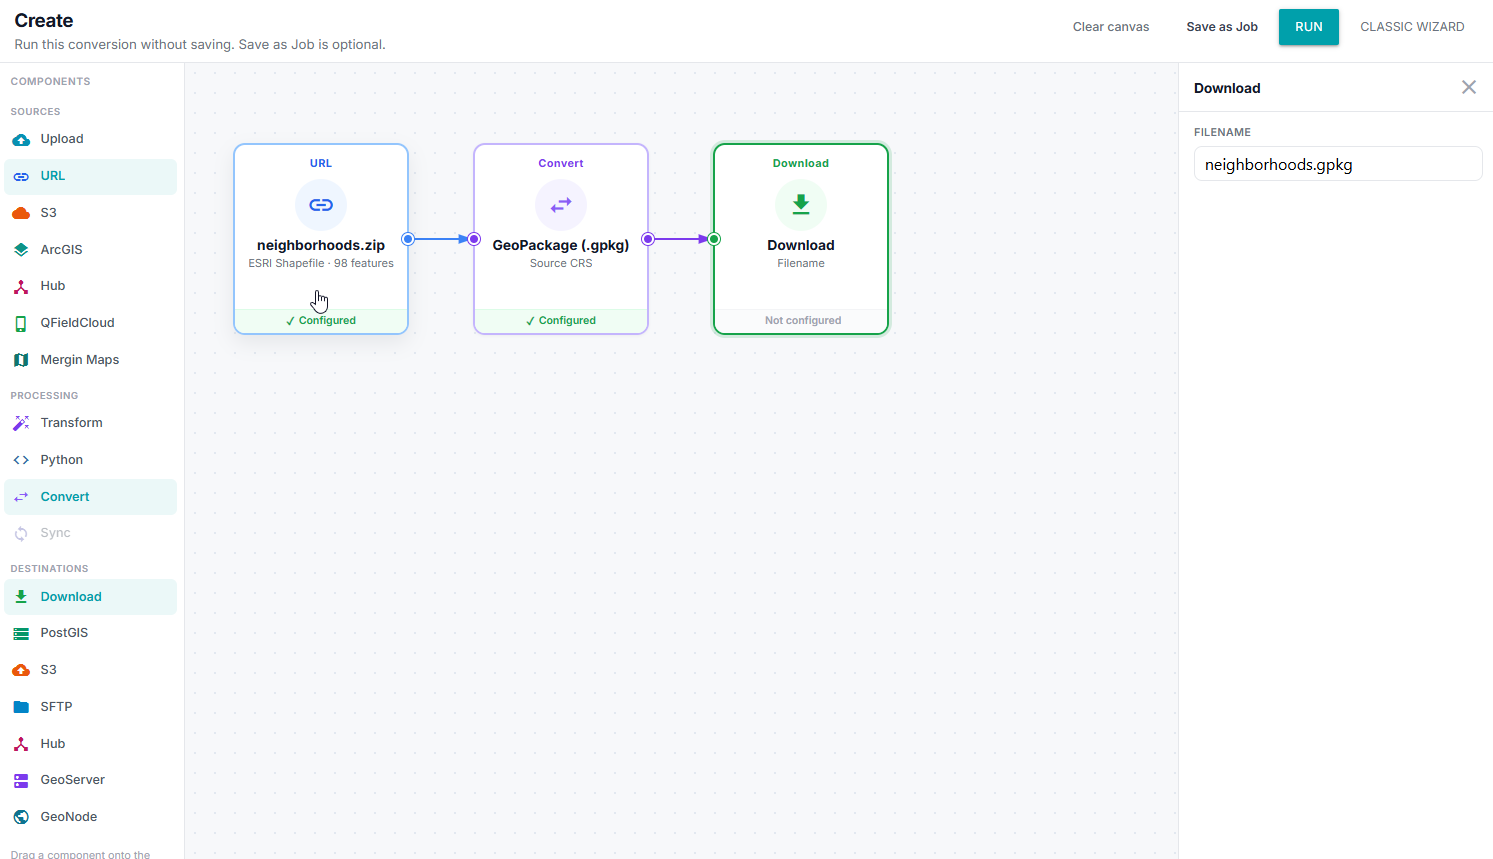
Uploading a file is convenient, but your data doesn't have to start on your computer.

Replace Upload with another Source such as URL or S3 and GeoJibe can import the data directly into the workflow.

GeoJibe also supports additional Sources for other workflows.

GeoJibe Canvas showing URL Source component connected to Convert and Download
Step 06

6. Transform the data

Before converting the dataset, we can add a Transform component.

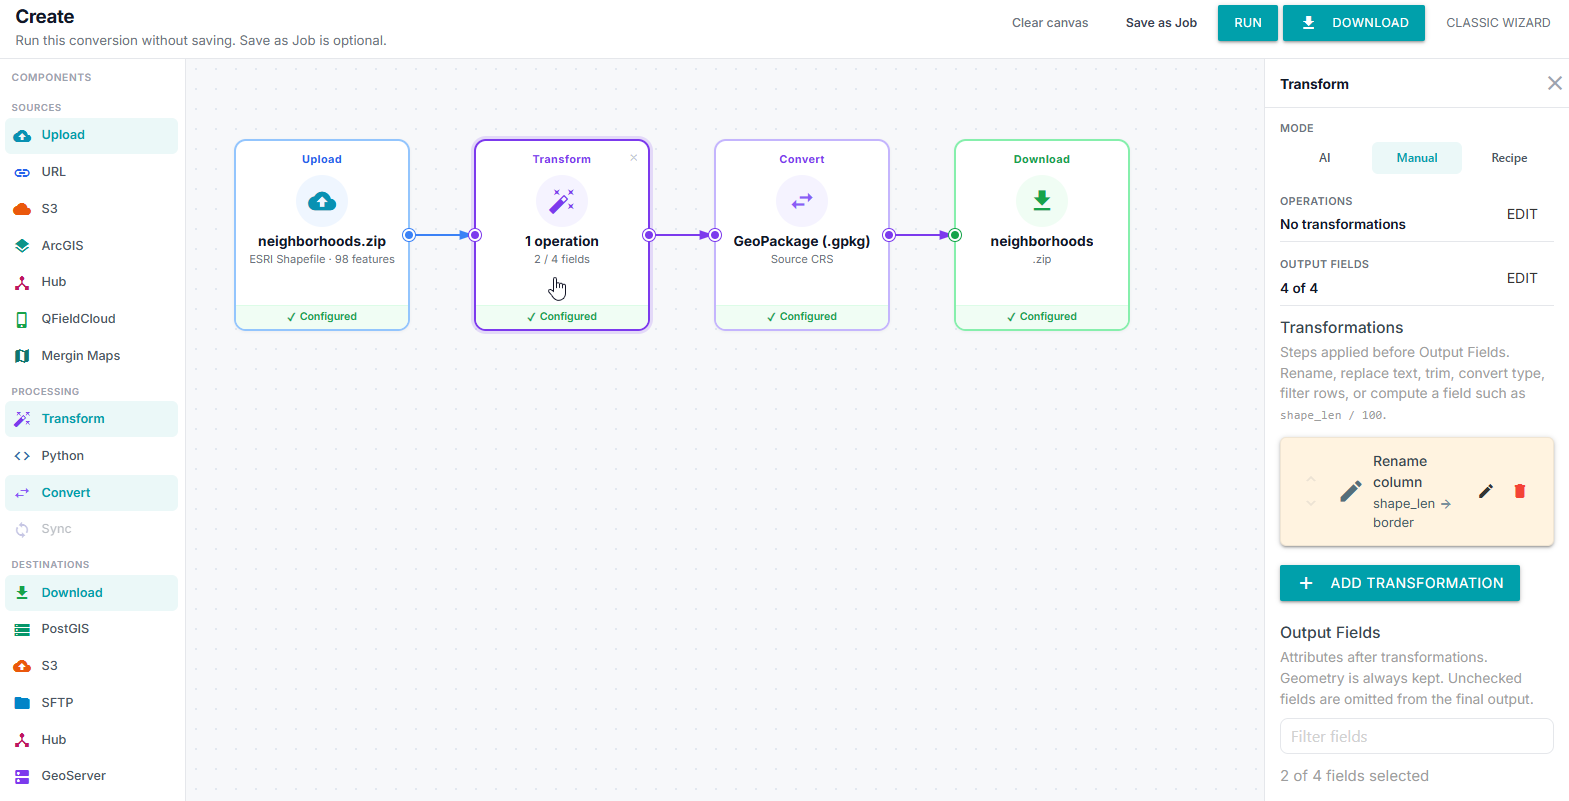
Add Transform between the Source and Convert components.

You can rename fields (such as shape_len → border), choose which fields to keep, clean up values, and make other changes before the data is delivered.

GeoJibe Canvas showing Transform component inserted between Source and Convert to rename fields and choose output columns
Step 07

7. Send the result to PostGIS

You don't have to download the finished file either.

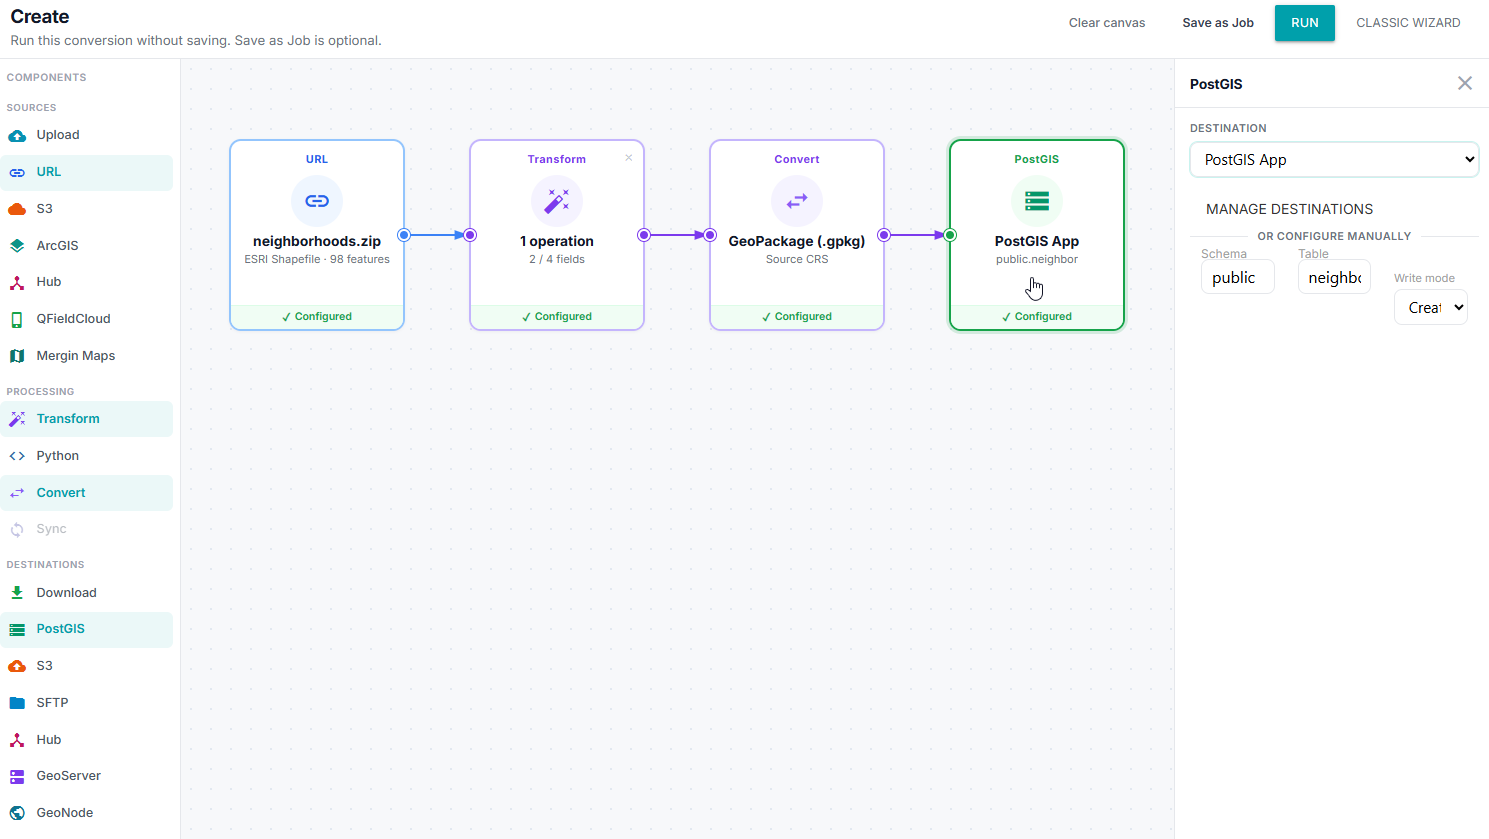
Replace Download with PostGIS and GeoJibe can deliver the processed dataset directly to your database.

Choose an existing connection, pick a schema and table, and run.

GeoJibe Canvas showing destination changed to PostGIS App
Step 08

8. Schedule It

Automate your workflow so it runs on a recurring schedule.

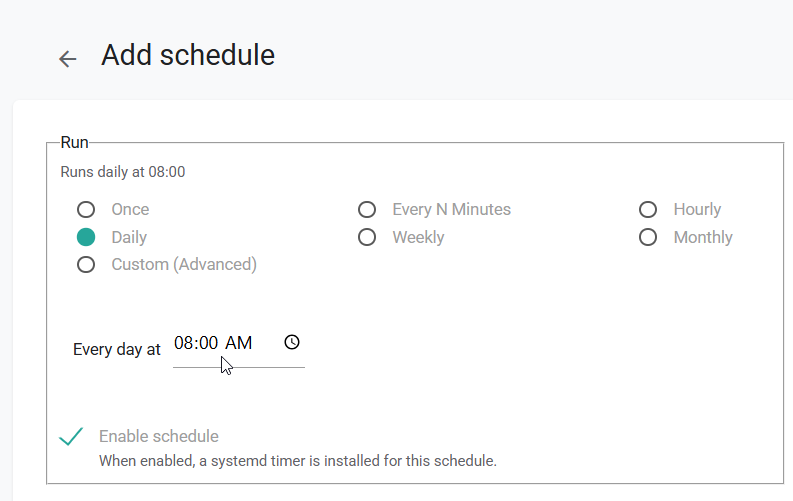
Save your workflow as a Job, choose your frequency (such as daily or hourly), and enable the schedule.

GeoJibe runs the pipeline automatically and keeps your data up to date without manual intervention.

GeoJibe Add schedule dialog showing daily execution configuration

That's the power of GeoJibe.

Start with a simple conversion. Add only what you need.

Source Bring data in
Processing Transform it
Processing Convert it
Destination Send it where it needs to go
Multiple ways to bring data in
Transform only when you need to
Choose the format you need
Download it or deliver it directly

Want to run it again? Save the workflow as a Job to reuse it or run it on a schedule.

Learn About Jobs

What would you like to do next?

Take your geospatial workflows further with automation, additional connections, and field sync.

Looking for something specific?

GeoJibe Guides cover Sources, conversions, transformations, Destinations, Jobs, synchronization, and troubleshooting.

Browse GeoJibe Guides
Secure & Private
Your data is processed securely and never shared.
Fast & Reliable
Powerful processing that scales with your data and your needs.
Works Everywhere
Web-based. No installation required.
Trusted by Professionals
Built for GIS pros, by GIS pros.